Is Your AC Acting Up? Try These Steps Before Calling a Pro
AC troubleshooting before calling a pro can save you a lot of time, money, and frustration — especially when temperatures spike in Salt Lake and Utah County and your system picks the worst possible moment to quit.
Here are the most common fixes homeowners can check right now:
- Check your thermostat — Make sure it’s set to Cool mode and the temperature is at least 3–5 degrees below room temp. Replace the batteries if the screen is blank or dim.
- Reset the circuit breaker — Find the AC breaker in your main panel, flip it fully off, wait 30 seconds, then flip it back on. Also check the outdoor disconnect switch.
- Inspect the air filter — Hold it up to a light source. If light can’t pass through, replace it. A dirty filter is the single most common cause of AC problems.
- Clear the area around your outdoor unit — Remove leaves, grass, or debris and make sure there’s at least 2 feet of clearance on all sides.
- Check for frozen coils or standing water — Ice on the copper lines near your indoor unit or water pooling around the base signals a problem that needs immediate attention.
Most AC issues trace back to one of these five things. Nine out of ten service calls turn out to be something a homeowner could have caught themselves — often a dirty filter or a simple settings mix-up.
That said, some problems genuinely do need a licensed technician. This guide walks you through each step clearly, so you know exactly when to keep troubleshooting and when to stop.

AC Troubleshooting Before Calling a Pro: Essential First Steps
When your home starts feeling more like a sauna than a sanctuary, it is easy to panic. Before you pick up the phone to schedule an emergency repair, taking fifteen minutes to perform a basic diagnostic check can often resolve the issue. In fact, roughly 80% of mid-season cooling complaints stem from incredibly simple, homeowner-fixable problems.
By taking a systematic approach to troubleshooting, you can keep your home comfortable and learn more about how your system operates. For more tips on keeping your home systems in peak condition, check out our guides on Home Maintenance.

Thermostat Settings and Battery Checks
It might sound too simple to be true, but incorrect thermostat settings are one of the most frequent causes of cooling complaints. Guests, children, or an accidental bump during cleaning can easily knock your system out of its proper mode.
- Verify the Mode: Ensure your thermostat is explicitly set to “Cool” and not “Heat,” “Off,” or “Fan Only.” If the fan is set to “On” rather than “Auto,” the blower will run continuously even when the system is not actively cooling. This can blow humid, unconditioned air back into your living spaces between cooling cycles.
- Check the Temperature Setpoint: Make sure the target temperature is set at least 3 to 5 degrees below the current room temperature. Setting the thermostat extremely low will not cool your house any faster, but setting it too close to the ambient temperature may prevent the compressor from cycling on.
- Inspect the Batteries: If your thermostat screen is blank, fading, or flashing a low-battery warning, replace the batteries immediately. Many modern thermostats rely on simple AA or AAA batteries to communicate with your heating and cooling system. Replacing dead batteries is a quick, inexpensive fix that beats a service call every time.
- Look for Drafts: Ensure no heat-generating appliances, lamps, or supply vents are directly blowing on or heating the wall near the thermostat. This can trick the sensor into reading the room as much warmer than it actually is, causing the system to run unevenly.
Resetting the Circuit Breaker and Disconnect Switch
Central air conditioners are high-draw appliances that pull a significant amount of electricity, especially on hot summer afternoons along the Wasatch Front. This high demand can occasionally trip a circuit breaker.
- Locate Your Main Electrical Panel: Open your home’s breaker panel and look for switches labeled “AC,” “Air Conditioner,” or “HVAC.”
- Perform a Proper Reset: A tripped breaker won’t always look fully off. It often hangs in a middle position. To reset it safely, flip the switch completely to the “Off” position, wait about 30 seconds to allow any residual electrical load to dissipate, and then flip it firmly back to “On.”
- The One-Reset Rule: If the breaker trips again immediately or shortly after you reset it, do not try to reset it a second time. Repeatedly resetting a tripping breaker can damage your compressor or cause electrical fires. A second trip indicates a serious electrical fault, such as a failing capacitor or a short circuit, which requires professional diagnostic tools.
- Check the Outdoor Disconnect Box: Your outdoor condenser unit has its own dedicated power disconnect switch, usually located in a small metal box mounted on the exterior wall near the unit. Check to make sure this switch hasn’t been bumped off during yard work or outdoor cleaning.
Maximizing Airflow and Indoor System Health
Your air conditioner works by pulling warm air out of your home, passing it over cold evaporator coils, and blowing the cooled air back through your ductwork. If anything blocks this continuous cycle of air, the system’s efficiency plummets, and major components can quickly fail.
Poor layout and duct leaks can also rob your system of performance; in fact, about 30% of the energy in ducted HVAC systems is lost due to leaks or poor design. While sealing ducts requires professional attention, maintaining proper airflow inside your living spaces is entirely within your control.
| Filter Thickness | Recommended Replacement Schedule | Best Practice for High-Desert Climates (Utah) |
|---|---|---|
| 1-inch pleated | Every 30 to 60 days | Check monthly; replace every 30 days during peak summer / wildfire season |
| 2-inch pleated | Every 3 months | Check every 45 days; replace if gray or dusty |
| 4 to 5-inch media | Every 6 to 12 months | Replace every 6 months; inspect mid-season |
Inspecting and Replacing the Air Filter
A dirty, clogged air filter is the number one cause of AC problems and accounts for the vast majority of summer service calls. When a filter becomes caked with dust, pet hair, and airborne debris, it acts as a literal chokehold on your system.
In our local high-desert climate, dry summer winds, pollen, and occasional wildfire smoke can cause filters to clog much faster than standard manufacturer guidelines suggest.
To inspect your filter, slide it out of the return air grille or the slot next to your indoor air handler. Hold it up to a nearby light source. If you cannot see light passing through the fibers, the filter is completely full and must be replaced.
When installing a new filter, always pay attention to the airflow arrows printed on the frame. These arrows must point in the direction of the air flowing toward your furnace or air handler, not away from it. Additionally, choose your filter’s MERV (Minimum Efficiency Reporting Value) rating carefully. While high-efficiency filters capture more microscopic particles, ratings above MERV 11 can restrict airflow on residential systems, leading to performance issues. For most homes, a MERV 8 to 11 filter offers the perfect balance of filtration and airflow.
Finally, keep your supply registers and return air grilles completely unobstructed. A common home maintenance mistake is closing vents in unused rooms to save energy. Modern HVAC systems are engineered for specific static pressure; closing more than 10% of your vents disrupts this balance, straining the blower motor and potentially causing system failure. Ensure furniture, rugs, and heavy drapes are not blocking any vents.
AC Troubleshooting Before Calling a Pro for Frozen Coils
When airflow is severely restricted, the temperature of your indoor evaporator coil can drop below freezing. Moisture in the air then condenses and freezes directly onto the coil, creating a block of ice that completely stops the cooling process.
If you notice weak airflow, lukewarm air blowing from your vents, or physical frost accumulating on the copper refrigerant lines entering your indoor unit, your system has frozen. Take these immediate steps to resolve the issue safely:
- Shut the Cooling Off: Turn your thermostat setting to “Off” immediately. Running the compressor with frozen coils can cause permanent, expensive damage to the unit.
- Run the Fan: Switch your thermostat’s fan setting from “Auto” to “On.” This keeps the indoor blower running without running the outdoor compressor, forcing warm indoor air over the frozen coils to accelerate the thawing process.
- Let It Melt Completely: Do not attempt to scrape ice off the coils or copper lines, as this can easily puncture the delicate metal and cause a major refrigerant leak. Thawing can take anywhere from 4 to 6 hours.
- Check the Air Filter: While the system is thawing, inspect your air filter. A clogged filter is almost always the culprit behind frozen coils. If the filter is clean, the freeze-up may be caused by low refrigerant levels, which must be addressed by a professional.
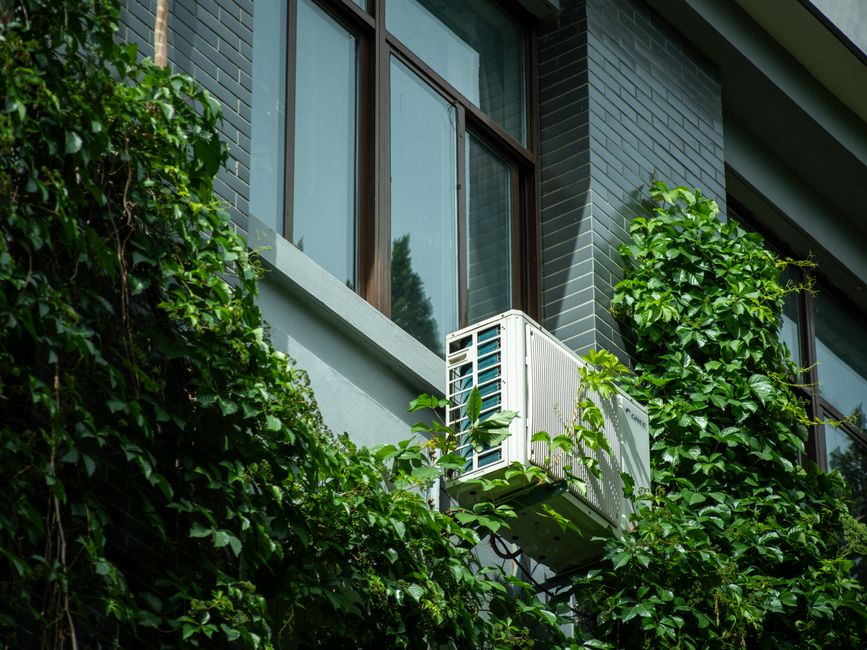
Outdoor Unit Maintenance and Drainage Solutions
Your outdoor condenser unit is responsible for releasing the heat extracted from inside your home. If the condenser coils are coated in dirt, grass clippings, or cottonwood seeds, the heat transfer process fails, causing your system to run longer, consume more energy, and blow lukewarm air.
Maintain at least 2 to 3 feet of clear space around your outdoor unit. Trim back any bushes, weeds, or flowers, and ensure no patio furniture or firewood piles block the airflow. To clean the coils safely, turn off the power at the outdoor disconnect box, then use a gentle spray from a garden hose to rinse away accumulated dirt. Never use a pressure washer, as the high-pressure stream will instantly bend and damage the delicate aluminum fins.
Unclogging the Condensate Drain Line
As your air conditioner cools your home, it also removes moisture from the air. This moisture condenses on the indoor coil and drips into a drain pan, where it flows out of your home through a PVC condensate drain line.
Over time, algae, mold, and dust can combine to form a thick sludge that clogs this line. Water leaks and drain clogs account for nearly 90% of all central air service calls. Modern cooling systems are equipped with a safety device called a float switch. If water backs up in the drain pan, the float switch rises and automatically cuts power to the entire system to prevent water damage to your ceilings and floors.
If your AC won’t turn on and you notice standing water in the drain pan beneath your indoor unit, you likely have a clogged drain line. You can safely clear this yourself using a wet/dry vacuum:
- Locate the condensate drain line exit outside your home, usually near the outdoor condenser unit.
- Attach the hose of your wet/dry vacuum to the end of the PVC pipe. Use a rag or duct tape to create a tight seal around the connection.
- Turn the vacuum on and let it run for 1 to 2 minutes to suck the clog through the line. You will often see a mix of dirty water and algae pull into the vacuum canister.
- To prevent future clogs, locate the T-shaped access port on the PVC line near your indoor unit and pour a cup of ordinary white vinegar down the line once a month during the cooling season. This kills algae growth before it can form a blockage.
AC Troubleshooting Before Calling a Pro for Strange Noises
Your air conditioner should operate with a consistent, predictable hum. If you begin hearing unusual or harsh sounds, it is your system’s way of telling you that something is wrong. Knowing what these noises mean can help you decide whether to continue troubleshooting or turn off the power immediately:
- Screeching or Squealing: This typically points to a failing blower motor bearing or a worn-out fan belt in older systems. It requires professional lubrication or replacement.
- Grinding: A heavy metal-on-metal grinding sound usually indicates that the bearings in either your condenser fan motor or compressor are failing. Shut down the system immediately to prevent total motor seizure.
- Clicking: Continuous clicking when the system tries to start usually points to an electrical issue, such as a failing capacitor or a faulty relay switch.
- Banging or Clanging: This suggests that a component has come loose inside the blower assembly or compressor, such as a fan blade hitting a housing unit. Turn off the system to prevent the loose part from causing further internal damage.
- Hissing: A loud, persistent hissing sound usually points to a high-pressure refrigerant leak. Because handling refrigerant requires specialized tools and licensing, you must call a professional immediately.
Frequently Asked Questions about AC Troubleshooting
Why is my AC running but not blowing cold air?
If your system is running but the air coming from your vents feels lukewarm, start by checking your air filter and thermostat settings. If those are correct, inspect the outdoor condenser unit to ensure it has power and the fan is spinning. If the outdoor unit is completely silent while the indoor fan is running, you may have a tripped outdoor breaker or a failed capacitor.
If both units are running but the air remains warm, you could be dealing with dirty coils, blocked ductwork, or a refrigerant leak. For a deeper look into whether your system needs a quick fix or an upgrade, read our AZ Guide to AC Repair vs Replace.
Why is my AC short cycling?
Short cycling occurs when an air conditioner turns on and off repeatedly every few minutes without completing a full cooling cycle. This puts immense strain on your compressor and spikes your energy bills. Common causes include:
- A Severely Clogged Filter: Restricted airflow causes the system to overheat and shut down as a safety precaution, only to turn back on once it cools down.
- Thermostat Placement: If your thermostat is installed near a drafty window, entry door, or directly under a supply vent, it may misread rapid temperature changes and cycle the system on and off constantly.
- An Oversized System: If your AC is too large for your home’s square footage, it will cool the air so quickly that it shuts down before properly dehumidifying the space, leading to frequent cycling.
When should I stop DIY troubleshooting and call a professional?
While basic maintenance is safe for homeowners, you should stop troubleshooting and call an expert immediately if you experience any of the following:
- Electrical Odors or Sparks: If you smell burning plastic, sulfur, or see sparks from any electrical panel, shut off the main power breaker immediately.
- Repeatedly Tripped Breakers: If your AC breaker trips a second time after a single reset, do not attempt to reset it again.
- Refrigerant Issues: Federal law requires EPA Section 608 certification to handle, recharge, or repair refrigerant lines. Homeowners cannot legally purchase or handle refrigerant.
- Severe Mechanical Failure: Loud grinding, screeching, or internal compressor noises require professional diagnostic equipment and replacement parts.
Conclusion
Taking a few minutes to walk through these basic checks can save you from a hot, uncomfortable afternoon and an unnecessary service call. Many common cooling issues can be resolved with a new thermostat battery, a clean air filter, or a quick flip of a circuit breaker.
However, when DIY troubleshooting reaches its limits, you need a team you can trust to get your home back to a comfortable temperature quickly. Regular professional maintenance can improve your AC’s efficiency by 5% to 15% and catch up to 90% of potential issues before they lead to a mid-summer breakdown.
At First Choice Heating & Air, we are proud to serve our community in Bluffdale, Salt Lake City, West Jordan, and across Salt Lake and Utah Counties with honest, reliable service, strong warranties, and convenient maintenance plans.
If your system is still acting up after running through these steps, don’t sweat it. Schedule your professional AC service today with First Choice Heating & Air and let our expert technicians take care of the rest!